")
How to Use the Text-to-Carousel Post Feature: Step-by-Step Guide
Creating engaging carousel posts has never been easier, thanks to our Text-to-Carousel Post feature! 🎉 Follow this guide to learn how you can transform plain text into a professional carousel in minutes.
Step 1: Choose a Carousel Template
Start by selecting any carousel template from the library.
📝 Important:
- Ensure the template has at least three slides.
- The first two slides are crucial! Each must have one main textbox.
Step 2: Add the “Description” Label
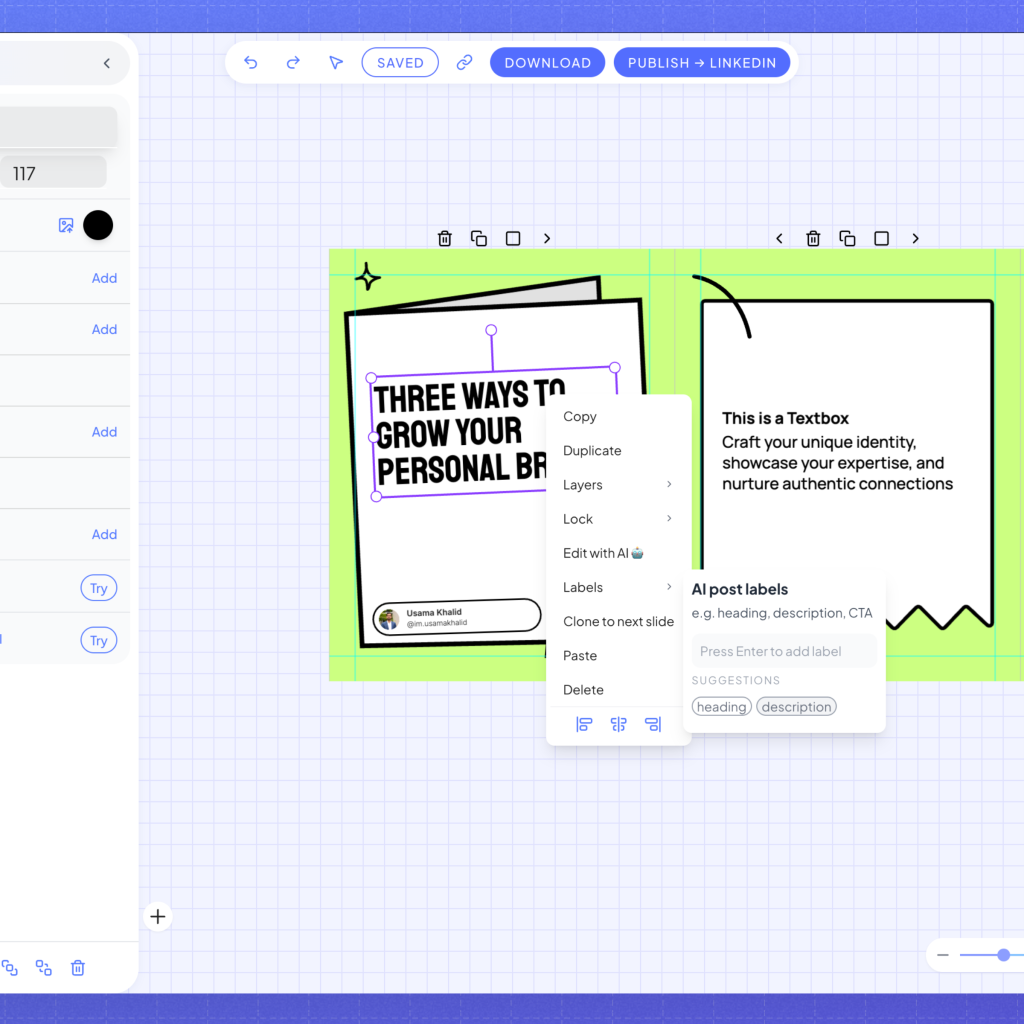
For the tool to work seamlessly, add the “description” label to the main textbox on both the first and second slides.
Here’s how to do it:
- Right-click on the textbox.
- Select “Labels” from the menu.
- Click “Description” to apply the label.
Step 3: Paste Your Content

Once your template is set, head to the “Text to Carousel” option on the left sidebar.
- Paste your text content into the input box.
- You can include some Markdown formatting (e.g., bold, italics) for enhanced styling.
- Use
---as a slide separator between paragraphs.
This is the first slide content.---This is the second slide content.Step 4: Generate Your Carousel
Click on the “Make This Carousel” button, and the magic begins! 🪄
💡 If your content is lengthy, the tool will automatically duplicate slides from the second slide to ensure all information is included.
Watch It in Action
Still unclear? Watch our step-by-step video guide here: [Insert Video Link] 🎥
Final Touches
Once your carousel is generated, review and tweak as needed to align with your style.

With the Text-to-Carousel Post feature, creating impactful LinkedIn and Instagram carousel posts is faster and easier than ever! 🚀
Try it out today and take your content to the next level.